Interior doors and their installation (10 steps)
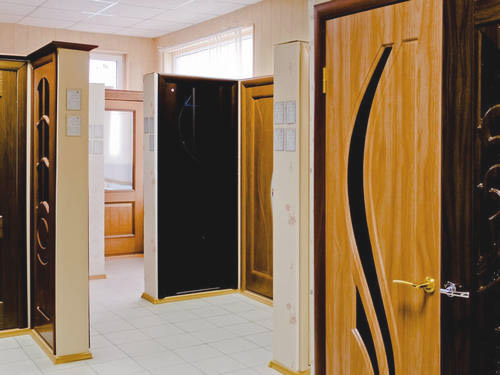
In the center of attention in any apartment is usually a door that should be both practical and aesthetic-we are talking in this case about the interior door. Such an element is not bought for a single year of operation, and therefore it is extremely important to observe the technological process of creating such things and installing them, so that their quality and durability do not cause complaints.
At first, the installation of interior doors with your own hands may seem like a simple task, which involves only collecting the box and installing it, as well as hanging the canvas. But in fact, this is not the case at all, and therefore it is better to trust such work to professionals who will make them taking into account all the requirements, will be able to correctly make the inset locks and other fine work, will take into account all the dimensions and dimensions. A professional will even be able to correct the defects of the doorway, if any, and there will be no problems, distortions and aesthetic imperfections. A beginner will never be able to perform such work with the same efficiency and beauty as a master does.
How is this done?
- If there is an old structure, then first of all it is necessary to ensure its dismantling. To perform such work carefully, it is advisable to file the side walls of the box with a hacksaw, and carefully remove them. This is not always easy – only old boxes can be removed easily, but modern solutions, reinforced with foam, require some effort. The next step is to install the hardware that needs to be embedded in the canvas. To do this, a marking is made at the place of attachment, loops are applied and their opposite edge is marked – it is advisable to make the application 200 mm from each edge. The milling cutter will allow you to make depressions. The holes must be drilled, the loop must be screwed, and the kit usually includes 35 mm self-tapping screws, which are necessary for this process.
- The next logical step is to install a lock, if one is expected. It is cut into the canvas. At a height of 1 m, a mark is made, there should be a handle. Next comes the installation of the lock: the rim is applied to the door end, marked with a pencil, the inner part is removed, and a cavity for the lock is obtained. Fasten the element with self-tapping screws, which are equipped with a lock. Next, the door handle is fixed, under which the hole should also be prepared.
- The next step is to transfer the loops to the box. To begin with, it is cut off in height, which is convenient to perform with a face saw, washed down by 45 degrees. Next, it is applied to the door with embedded hinges and move the marks, not forgetting to push the part that is filed at an angle so that the door does not rub against the jamb – the gap should be 3-4 mm.10 mm is added from the opposite part of the box, and cut off all the excess. The lower gap should be left within 8-10 mm.
- After cutting the height, you can put the loops on the marks. Next, the top of the door frame is filed. The plank is filed so that the gaps on three sides except the bottom are approximately 3 mm-6 mm is added to the width of the door leaf. Considering that all these manipulations will not be so simple, it is more reasonable to buy a canvas and a box at once in a set, and not to break up into separate purchases. Yes, and in the price at the same time you will win.
- Next, you need to assemble the box. At the same time, the masters cut down the side parts at 45 degrees. The lower part does not need to be filed, there is a threshold. The bars are connected according to the shape of the doorway. Self-tapping screws can be placed at an angle or straight, this factor does not change anything, but 3 self-tapping screws are placed on each of the corner sides. Setting the threshold requires measuring it in the same way as the upper beam, with an overlap of several mm. The threshold on the sides of the corner is not filed, but the side post is cut so that the door does not come into contact with the jamb.
- Next, the door frame is placed in the opening. It is placed there after assembly and fixed on the wedges. Next, the box is fixed with a pair of self-tapping screws on the side of the hinges, and the standards state that the reinforcement should be created by six self-tapping screws in total, three of them are used on each side, and the holes are closed with plugs. In practice, 2-3 self-tapping screws on MDF are quite enough, it is better to install solid wood products according to the standard, as it is supposed. After all, the weight of such things is very different, which causes variations in fasteners.
- The screws along their length are selected so that after the box there is still about 30 mm left for the normal strengthening of the structure. Ideally-50 mm. This will even make it easy to straighten the structure, if it leads with time.
- Having put a box with a plumb line or level, having strengthened it with screws on the loop cards, it is worth putting three bars-retainers so that it holds firmly, and foaming the system. It should be remembered that the foam mounting can hide unpleasant surprises, and it can spoil the door frame, and therefore it makes sense to use masking tape to protect those surfaces on which the foam can get. After foaming, it is necessary to leave it in its current state for a while, so that everything dries out. In order not to squeeze out the jambs with foam, it is worth using spacers, this will allow you to get a decent result without unpleasant surprises.
- The door frame also requires special attention. This is in a number of situations a necessary element for the installation of platbands, and therefore it can not be evaluated as an ordinary piece of clapboard with finishing. In a number of situations, it is mandatory to put it-when the wall opening has a large thickness.
- The door frame is installed according to the following principle. It is fixed on the inside of the box, the space that separates the box from the wall is foamed. There is also another solution – the necessary space is allocated in the door frame, the door is fixed there with screws. And the box grows up to the wall, dobor is on a level with it. Platbands are fixed on both sides.
At this point, the installation process is completed, the door must be checked by closing it, examining the gaps, searching for obstacles, if any. After making sure that there are no problems, the installer can nail the casing, and confidently declare that the work is completed.
Pub date: 2021.05.31